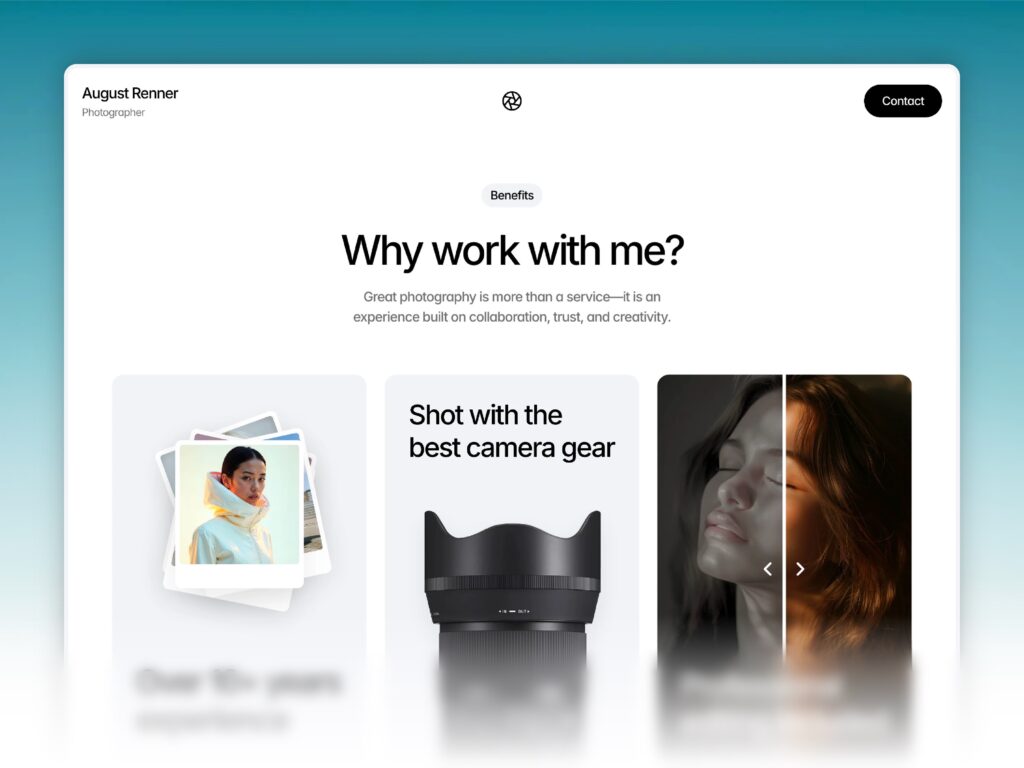
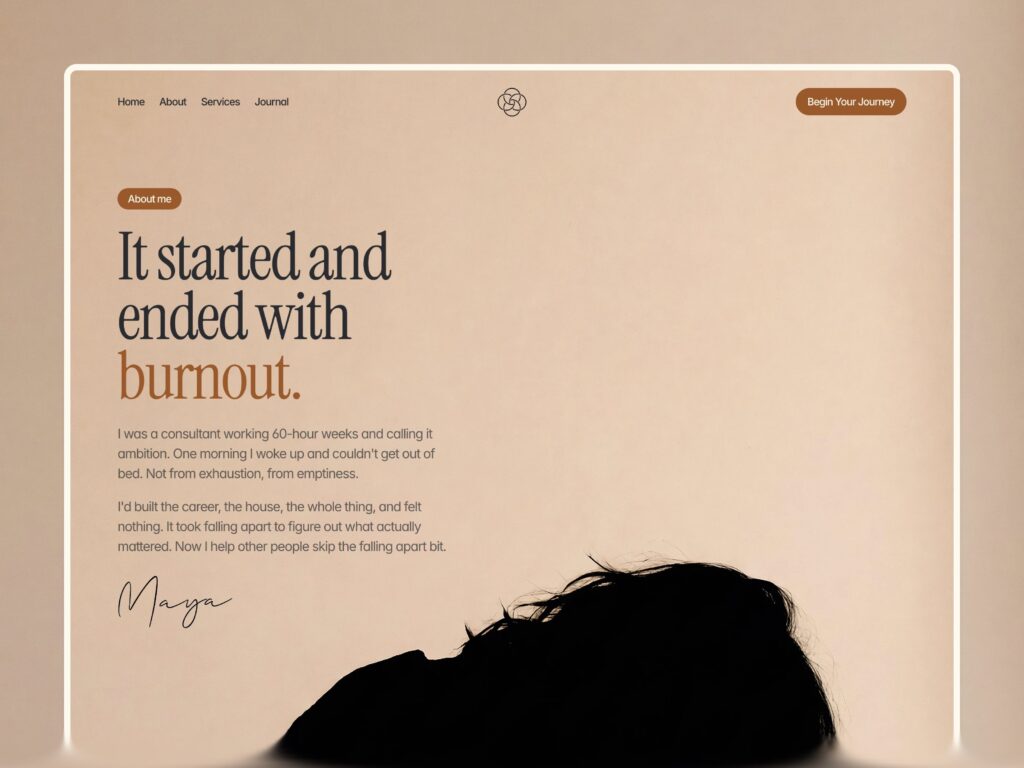
WordPress + Elementor
Template Course
Learn WordPress and Elementor quickly to create stunning, responsive websites confidently without technical experience today.
Learn more
STEP-BY-STEP SCRIPT OUTLINE
- Choose your hosting — Log in to your hosting provider’s dashboard. If you don’t have one yet, we recommend any host that offers “one-click WordPress install” — look for names like SiteGround, Hostinger, or Bluehost. Click the option that says “Install WordPress.”
- Run the one-click install — Fill in three things: your website name, a username, and a password. Write these down somewhere safe. Hit “Install” and wait about 60 seconds. That’s it — WordPress is now live.
- Log in to your WordPress dashboard — Go to
yourwebsite.com/wp-admin, enter the username and password you just created, and you’re in. This is your home base. - Install the Elementor plugin — On the left-hand menu, click Plugins → Add New. In the search bar, type “Elementor.” When it appears, click Install Now, then Activate. You’ll see a welcome screen — you can skip the setup wizard for now.
- Install the Elementor Pro plugin — If your template requires Elementor Pro (we’ll let you know in the product details), go to your Elementor account, download the Pro plugin file, then go to Plugins → Add New → Upload Plugin, upload the file, and activate it.
- Do a quick settings check — Go to Settings → Permalinks in your WordPress dashboard, select “Post name,” and click Save. This small step prevents a lot of headaches later.
SECTION 1: Getting Started
"Your Website Foundation: Setting Up WordPress for Elementor"
Learn more
STEP-BY-STEP SCRIPT OUTLINE
- Open your page in Elementor — Go to Pages, hover over the page you imported your template onto, and click Edit with Elementor. The page builder will open with your full template visible.
- Edit your text — Click on any block of text in the template. An editing panel opens on the left side. Simply highlight the existing text and type your own. Do this for every headline, paragraph, button label, and any other text on the page.
- Swap out images — Click on any image in the template. In the left panel, you’ll see the current image displayed. Click on it, then click Choose Image, and upload a photo from your computer — or select one from your media library. Your new image will instantly replace the old one.
- Change your colors to match your brand — Click on any element, then look for the “Style” tab in the left panel. You’ll see color options — click the color box and type in your brand’s hex code (that six-digit color code your designer gave you, or one you found on a site like Coolors.co). Repeat for buttons, backgrounds, and headings.
- Update your logo — Find the header section of your template, click on the logo image, and replace it with your own logo file. If you don’t have a logo yet, a simple text-based placeholder works perfectly for now.
- Edit your navigation menu — Go to Appearance → Menus in your WordPress dashboard (in a new tab). Here you can rename menu items and link them to the correct pages on your site. Save your changes and come back to Elementor.
- Preview on mobile — Click the mobile phone icon at the bottom of Elementor’s screen. Check that your text is readable and nothing looks squished. If something needs adjusting, you can fix it specifically for mobile without affecting the desktop view.
- Run your pre-launch checklist:
- ✅ All placeholder text replaced
- ✅ All placeholder images replaced
- ✅ Contact form connected to your email
- ✅ Your logo is in place
- ✅ Site looks good on mobile
- ✅ Pages are all published
- Set your homepage — Go to Settings → Reading in WordPress and under “Your homepage displays,” select “A static page,” then choose the page with your template. This makes it the first thing visitors see.
- Hit Publish and celebrate — Click Publish in Elementor one final time. Your site is live. Go to your domain in a fresh browser tab and see it for yourself.
SECTION 3: Customization Walkthrough
"Make It Yours: Editing Your Template and Launching with Confidence"
Learn more
STEP-BY-STEP SCRIPT OUTLINE
- Download your template files — Go to your purchase confirmation email or your account page on our website. Download the template file — it will be a
.zipfile. Don’t unzip it. Keep it exactly as downloaded. - Navigate to Elementor’s template library — From your WordPress dashboard, click on Templates in the left menu, then select Saved Templates (or “My Templates”). You’ll see a button at the top that says Import Templates — click it.
- Upload your template file — Click “Select File,” find the
.zipfile you just downloaded, and click Import Now. In a few seconds, your template will appear in the list below. - Create a new page — Go to Pages → Add New in your WordPress dashboard. Give it a name — for example, “Home.” Then click Edit with Elementor to open the page builder.
- Insert your imported template — Inside Elementor, click the grey folder icon in the bottom toolbar (that’s the Template Library button). Go to the “My Templates” tab. You’ll see your imported template — hover over it and click Insert.
- Confirm and preview — Click Yes if it asks whether you want to import the template’s settings. Your page will now be filled with the full template design. Hit the eye icon at the bottom to preview it — and enjoy that moment!
- Publish your page — When you’re ready, click the green Publish button in the bottom left corner of Elementor. Your template is now live on its own page.
SECTION 2: Importing Templates
"One Click to Beautiful: How to Import Your Elementor Template"
Learn more
STEP-BY-STEP SCRIPT OUTLINE
- Open your page in Elementor — Go to Pages, hover over the page you imported your template onto, and click Edit with Elementor. The page builder will open with your full template visible.
- Edit your text — Click on any block of text in the template. An editing panel opens on the left side. Simply highlight the existing text and type your own. Do this for every headline, paragraph, button label, and any other text on the page.
- Swap out images — Click on any image in the template. In the left panel, you’ll see the current image displayed. Click on it, then click Choose Image, and upload a photo from your computer — or select one from your media library. Your new image will instantly replace the old one.
- Change your colors to match your brand — Click on any element, then look for the “Style” tab in the left panel. You’ll see color options — click the color box and type in your brand’s hex code (that six-digit color code your designer gave you, or one you found on a site like Coolors.co). Repeat for buttons, backgrounds, and headings.
- Update your logo — Find the header section of your template, click on the logo image, and replace it with your own logo file. If you don’t have a logo yet, a simple text-based placeholder works perfectly for now.
- Edit your navigation menu — Go to Appearance → Menus in your WordPress dashboard (in a new tab). Here you can rename menu items and link them to the correct pages on your site. Save your changes and come back to Elementor.
- Preview on mobile — Click the mobile phone icon at the bottom of Elementor’s screen. Check that your text is readable and nothing looks squished. If something needs adjusting, you can fix it specifically for mobile without affecting the desktop view.
- Run your pre-launch checklist:
- ✅ All placeholder text replaced
- ✅ All placeholder images replaced
- ✅ Contact form connected to your email
- ✅ Your logo is in place
- ✅ Site looks good on mobile
- ✅ Pages are all published
- Set your homepage — Go to Settings → Reading in WordPress and under “Your homepage displays,” select “A static page,” then choose the page with your template. This makes it the first thing visitors see.
- Hit Publish and celebrate — Click Publish in Elementor one final time. Your site is live. Go to your domain in a fresh browser tab and see it for yourself.